Decision 1 - Patterning
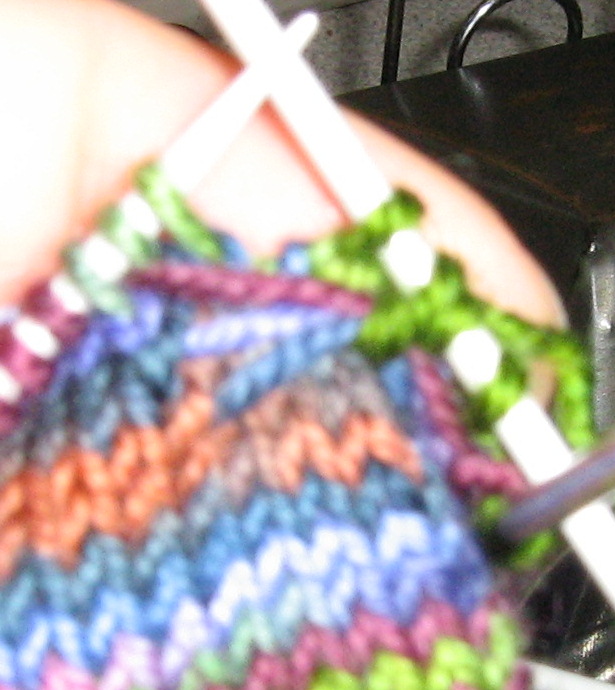
This is the juicy part! The pattern stitch I chose is from Barbara Walker's first Treasury and it's called Little Butterfly. It's a cluster of loose yarn that is gathered in a bow. Each butterfly requires 5 stitches and 6 rows.
Here's how to knit each cluster in the round:
Row 1: With the yarn in front, slip the next five stitches to the right hand needle. Put the yarn to the back and continue knitting. You will be leaving this loose strand behind to be picked up later.
Row 2: Knit.
Row 3: As row 1.
Row 4: Knit.
Row 5: As row 1.
Row 6: Knit the first two stitches of the five stitch group. Slip your needle under the loops of yarn and up until you've caught all three loops. Like so:

 Knit the next stitch, pass the loop over the stitch just knit and continue knitting.
Now Barbara Walker's pattern grouped the butterfly clusters in a checkerboard pattern like this:
V_V_V_V
_V_V_V_
V_V_V_V
_V_V_V_
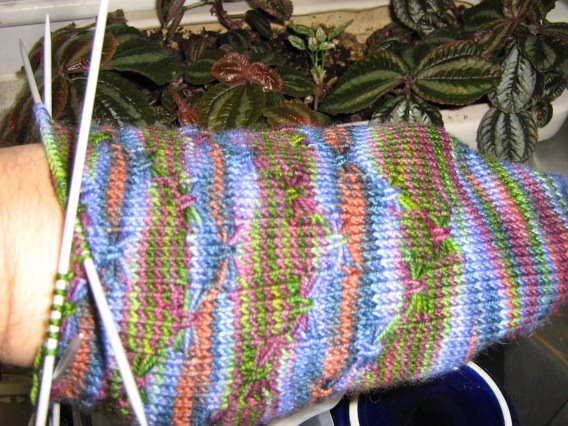
Where V is one of the clusters of 5 slipped stitches, and _ is knit 5. There are 7 groups of 5 stitches, for 35 stitches, or half the total of my sock.
I decided to do something different:
V__V__V
_V___V_
__V_V__
___V___
You could do either of these two, but why stop there? How about this idea:
V___V__
_V___V_
__V___V
___V___
Or anything else your wild imagination leads you to.
Decision 2 - What size am I making?
This is important! If you are making a size that is familiar to you, with yarn and needles that are familiar, you probably don't need to swatch. I didn't. I have big feet, so I started with a 2.25 mm needle and 70 stitches.
If you have medium size feet, you may find that all you need to do is go down to a 2mm needle resize the sock. Also, I find that the STR lightweight is actually rather thick, so a thinner sock yarn might give a medium sized sock.
If you have small or narrow feet, you will want fewer stitches on the needles. With a 5-stitch repeat, you could go down to 65 or 60 stitches even. When in doubt, swatch and measure.
Decision 3 - How to start?
I started at the toe, but you could just as easily start at the top. Things to consider are:
- How are you going to place your pattern repeats?
- Do you care if the stitch pattern is upside down?
- Which way works best for your skill level? Or do you want to learn a new technique with this sock?
- What kind of heel do you prefer? There are many more options heel options for top-down socks than for toe ups and some people find a short row heel to be too shallow.
My favorite toe up is this:
Using waste yarn, cast on 70-stitches. I use a crochet-hook and a technique described in Charlene Schurch's Sensational Socks for my provisional cast on, but there's also a tutorial here.
Then proceed to make your favorite short-row toe. Wendy provides a comprehensive tutorial over at Knitty.
The Foot
When I swatched, I noticed a slight reduction in the elasticity of the fabric. So I decided to add a stripe of ribbing along the side of my sock. The ribbing compensates for the stitch pattern and it provides a design element that divides the sock into two parts.
Here's how I divided up my stitches:
- Needle 1: This is the front of the sock and it holds 21 stitches. Purl the first stitch, and the remaining 20 stitches represent 4 units of pattern.
- Needle 2: Also the front of the sock, it holds 16 stitches. 3 units of pattern and one purl stitch.
- Needle 3: The back of the sock, it holds 17 stitches. Start with K1, P1, K1, P1, then knit to the end.
- Needle 4: Also the back, it holds 16 stitches. Knit to the last four stitches, then P1, K1, P1, K1.
 Up next, we'll have to think about the heel, the leg and how to finish the dang thing off!
Thanks for the kick in the pants, Knitty Kat!
What a coincidence! I just finished swatching the Butterfly stitch (almost the same as this one except the stitches are gathered differently). I love it, and it has my design juices flowing. Not for socks, though.
ReplyDeleteYour socks are wonderful ... I like how you've rearranged the butterflies, and will be watching for the final result.
Thanks for the pattern! I can't wait to try these!
ReplyDeleteLooking good! I haven't used STR yet, but I was surprised by your comment that the lightweight is a bit heavy. I'll have to keep that in mind.
ReplyDeleteMmmm... very pretty. Darn! I might have to add these babies to my Socktoberfest to-do list!
ReplyDeleteIf you need help finishing the sock. I can help. It's my pirmary mode of sock knitting.
ReplyDeleteJust shoot me an email.
Have a good one and I just got your email. Yeah!
What a gorgeous sock!! I think I know what I'll be doing with my Koigu now :o)
ReplyDeleteHow am I supposed to print this and carry it with me?! Hmm . . you KNOW I can't read blogs at work. (geez, some people and their free patterns)
ReplyDeletewink!